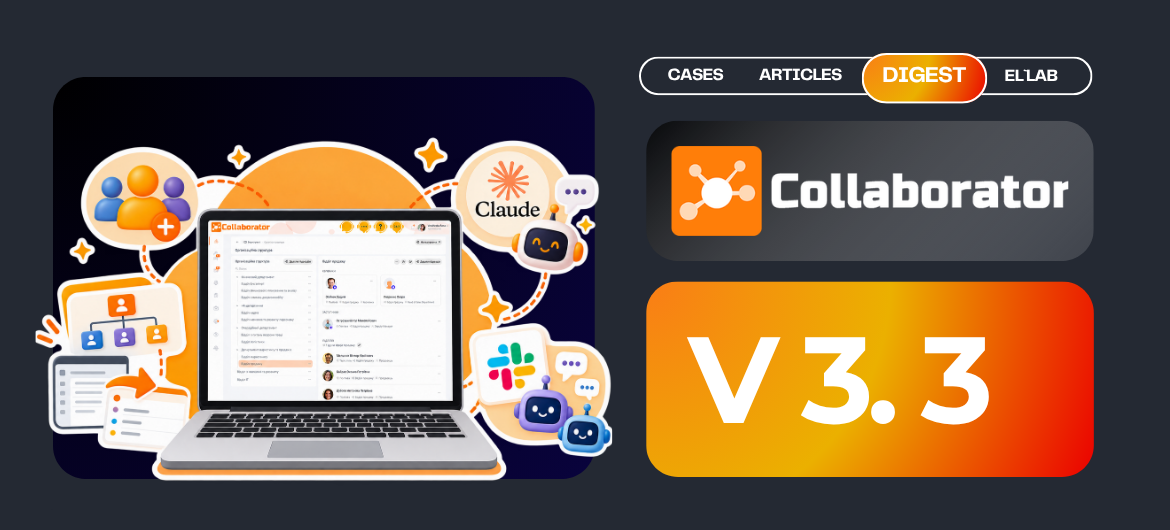
LMS Collaborator 3.3 – User groups, migration of the organizational structure to the new design, and integration of custom fonts
As they say, in this world, you have to run as fast as you can just to stay in the same place. If you want to get somewhere, you have to run twice as fast.
Since standing still isn’t our style, less than two months have passed since our last release, and we’re already ready to introduce LMS Collaborator 3.3 to you. Brace yourselves, because there are a lot of new features — especially those related to the new design — and there’s no longer a button in this version to switch back to the old one. So let’s get started!
User groups
If you’ve been with us for a while, you know that previously, in order for users to be added to a folder in the organizational structure, you had to create it and configure the rules governing its operation. We determined who exactly should be added to it based on four criteria: city, position, department, and tags.
For example, these could have been administrators who lived in Vinnytsia and belonged to the third department. Accordingly, the system added all users who matched these criteria to the folder.
Now, working with the organizational structure has become even more flexible. We simply create folders, and then, to populate them, we add user groups, which are displayed on a separate page in a table format. In other words, they’re all gathered in one place. You can filter them by number of users, date of last change, or area of application.

User Groups in the Organizational Structure
This page also includes the functionality for creating a new group. To do this, click the “Add” button, enter a name and a brief description, and select a scope. The last step is required, because without it, the group cannot be applied anywhere.
Setting up a New Group
Next, we’ll set up who exactly should have access to it.
Here, we have two options. We can:
- Add users manually
- Set group rules
In the first case, you select specific users who, for one reason or another, need to be added to this group. Importantly, they will remain in this group regardless of their attributes.
Manually adding users
In the second case, we click the “Add rule” button, after which a list of available attributes appears, namely “City,” “Position,” “Department,” and “Tags.” We select the one we need.
Let’s say we want to find all employees from Dnipro. Next, go to the “Status” column. Here, you’ll see options such as “Include” or “Exclude.” Select the first option if you want to add employees specifically from Dnipro. If you select the second option, the system will include employees from all cities except Dnipro.
Adding users based on a rule
There is no limit to the number of rules you can add. Also, none of the four attributes is required. In other words, if you do not specify the required tags, the group will operate solely based on the specified rules. In this case, any tag — or the absence of a tag — will be considered valid.
To view all users in our new group, click the “Actions” button, where they are displayed in a table. Here, under “Assignment mode,” we can see how each user was added — either automatically based on rules or manually.
Users added to the group
But most importantly, we won’t have to go in and set everything up from scratch in the future. All we need to do is select an existing group from the list and use it wherever it’s needed.
Migrating the organizational structure to the new design
Gradually, step by step, our system is being updated both visually and, of course, in terms of usability. This time, it’s the turn of the “Organizational structure” page, which displays the company’s hierarchical tree on the left and the user interaction area on the right.
Organizational structure page
When we open the organizational structure from the very beginning, the system informs us that it is empty, and we can choose one of three options for how it will function.
Option №1: User group mode
It is considered the default setting and is applied by default. In this case, we create groups and manually add them to folders. Please note that we don’t need to select which users will be included here, as we did before. We simply click “Save” and proceed to work with the folder.
Next, we have two options: either add employees manually or select from the list and import user groups already in the system. All employees will be displayed according to their status, labeled as “Managers,” “Deputies,” or “Subordinates.”
Organizational Structure of the Department
It’s important to understand that we can just as easily delete users who were added manually. However, the process works a little differently for users who were added to the folder based on a rule. These users are removed only if the original rule is changed.
We can apply many different groups to a single folder at the same time. However, there is an important detail to keep in mind. If we select a group that is already being used in another folder, a conflict will arise. To resolve this, you must either leave the affected users in only one of these groups or add them to the desired folder manually.
So, the rules haven’t really changed — they’re just configured differently now. This means that when updates are released, you won’t lose your previous structure, since it will automatically adapt to your existing groups and folders.
Option №2: Import-based mode
This is done using a CSV file or through API integration with the service you need. The method is very simple and can be implemented in just a few clicks. The only thing to note is that with an organizational structure based solely on import, you won’t be able to add users manually or assign groups to folders, so it’s best to keep this in mind from the very beginning.
Configuring the mode based on imported data
Option №3: Hybrid mode
This method is versatile because it combines the previous two options. When we enable it, we can either transfer users via import or use groups for this purpose.
Configuring hydride mode
We also have additional settings here that allow you to assign a single employee to several different folders. Accordingly, in this case, the conflict log does not trigger, since the user can be in both places at the same time.
In addition, we used to have a button for assigning employees to the organizational structure; when we clicked it, the system would go through all the folders, check the settings there, and either add or remove someone as needed.
Currently, this button is not available. The system works such that when we make changes to a folder, it immediately and automatically applies those changes without having to regenerate the entire organizational structure. Accordingly, if we add a group here, we’ll see those users appear here right away.
The same applies to each individual employee: when an attribute changes for them and they are no longer part of that group, they will no longer be displayed in the structure either.
Integration with Anthropic Claude
We know you’ve been waiting for this update!
Why are we so sure?
Because you’ve been asking us to expand our list of integrations with AI providers. So now, in addition to OpenAI, Azure OpenAI, AWS Bedrock, and Google Gemini, you can also choose Anthropic Claude to help you complete your tasks.
Enabling Anthropic Claude
It works the same way as with other AI-powered assistants: go to the integrations section, select the desired provider and model, enter the token, and get started.
Anthropic Claude can help you edit, improve, or expand your lecture text, find relevant images, generate test and survey questions based on the text, and more.
Generating questions using AI capabilities
Connecting multiple bots via Slack
Continuing with the topic of integrations, LMS Collaborator now offers the ability to connect multiple bots in Slack. The general process remains the same. Go to “System Settings,” select “Integrations,” click on “Notifications,” and connect the Slack bot by entering the token for the space you want to work with.
The difference is that the platform now lets you add another workspace if needed. So we enter its token and click “Save.” The system will verify that you belong to that workspace, and only then will it grant permission to receive notifications via the Slack bot.
Adding a Slack bot to your work environment
Permission to view reports for your own tasks
If we go to the role settings, we’ll see a list of permissions there. We’ve added another item to this list — the ability to view reports on one’s own tasks.
How does this work?
If a user is the author or co-author of a task, enabling this permission will allow them to view both the test created based on that task and the report on how it was completed. This works the same way for other learning materials. However, they will not have access to system reports.
View Report
Viewing the final results of the survey
When creating a survey in the settings, we’ve added a button that lets you view the summary of test results. And here, we have two options.
If this option is not enabled, the user will simply see the standard survey with answer choices.
Surveys in LMS Collaborator
When we click this button, after the user has answered all the questions — which is a mandatory requirement — they gain additional access to the “My answers” and “Survey results” tabs. The system will automatically redirect them there, but only after they click the “Finish” button.
Here, the user sees the overall results of the survey, including the responses from other employees who have already completed it. The sequence is designed this way so that previewing the results does not influence the objectivity of their judgments. That’s why they must complete the survey first, and only then gain access to the results.
Survey Results
Highlighting Unanswered Questions in “Surveys”
As we continued to improve the “Surveys” feature, we realized that you’ve probably encountered our classic warning at least once: “Oops, you can’t complete this survey because you haven’t answered all the questions.” But when there are dozens of questions, you have to scroll quite a bit to find the field you missed.
That’s why we’ve made it so that when a user clicks the “Complete Survey” button, the system highlights the unanswered questions in red. As soon as the user starts typing in that field, the highlighting disappears immediately.
Reminder of Unresolved Issues
Highlighting an employee’s strengths and areas for development based on a competency assessment
The final step in the competency assessment is typically carried out by the employee’s immediate supervisor. The supervisor also reviews the final report, which contains an overall assessment of the employee. Now, during the competency assessment, an administrator or manager can select specific competencies from a drop-down list, identifying them as the employee’s strengths or areas for development. If these fields are filled out, the user will automatically see them in their report. If not, the report will not include any unnecessary blank sections.
Competency Assessment Protocol
Distinction between assessments based on competencies and those based on criteria
In the updated LMS Collaborator, we’ve also separated criteria-based assessments from competency-based assessments so that if you use both types, you can immediately identify the tasks you need without getting lost in the details.
Selecting the Type of Assessment
But keep in mind that if the competency-based assessment module is disabled in the system, then you won’t have this breakdown by type, nor will you have a filter based on them.
Refactoring an Excel report on evaluation by criteria
We believe that when it comes to good design, no detail is too small. Even when it comes to the appearance of an Excel report with a user’s final evaluation. That’s why this report has also been updated.
It currently consists of the task title, followed by the criteria and the corresponding answers.
New Excel Report
In addition, comments in the report are displayed in a more logical way. If the rating itself is broken down into separate clusters, the comments associated with it will be automatically grouped according to those clusters and criteria. This makes navigating the report even more convenient.
Update to the PDF viewer
One of the file types we can upload to the platform is a PDF file. Visually, the viewer hasn’t changed much, except for one significant detail — the addition of a print button. Click it. Wait a few seconds for the preparation process to finish. Print the selected PDF file.
Enabling permission to print a PDF file
But that’s not all! All links within PDF documents now open in a new tab by default. So, when clicking on a link (for example, to an external website or a Google Doc), users won’t accidentally close the portal page and can easily return to their studies.
Our team also received requests to add the ability to view PDF documents in full-screen mode for a more comfortable reading experience, which we’ve successfully implemented in this version.
New Features of PDF Documents
Enabling custom fonts in a text editor
From now on, you can customize your educational materials or announcements to match your company’s corporate style. You can find step-by-step instructions for setting this up in the “Appearance” tab, and the entire process will take no more than a few minutes.
Montserrat, Roboto, Open Sans, Nunito, or even GeistPixel — they’re all at your disposal! Don’t hold back — but stick exclusively to the open-source fonts from Google Fonts.
Selecting a Font in a Text Editor
Creating new categories and access groups on the resource editing page
And here’s another feature that has “moved over” from the old design to the new one.
The way it works has remained virtually unchanged. When creating a new resource, we can select access categories. We open the list of categories. We click the “Create new category” button. We’re taken to a page that opens in a new window. We add the category we need.
Creating a New Category on a Resource Page
Access groups are just as intuitive: here, you configure exactly who will see this resource in the Knowledge Base. In other words, you can quickly choose who will be able to view it: all users or only a specific subset of them.
Creating a New Access Group on the Resource Page
The “Save and continue editing” option for the “Page” resource
We’ve made several changes to this section.
First, the “Save” button is now labeled “Save and exit.” This was done to make it clearer. In other words, when we click it, we save this resource and go to the table.
“Save and Continue Editing” option
Second, the “Cancel” button has been renamed to “Cancel changes”. Its overall functionality has also been updated. Whereas it used to take us out of the table, it now reverts this resource to its previous version.
Third, in addition to “Save and exit, we also have options such as “Save and preview” and “Save and continue editing.” In the first case, we can view a preview of the work we’ve done so far, and in the second, we can stay on the page and continue making changes.
Adding the “Used in” block to tasks
It’s simply impossible to keep track of where and which tasks we’ve already used. But now there’s no need to, because we have the “Used in” section for that. So we just click the button and view the list of all trajectories and task sets for the individual plan where they’ve already been added.
The “Used in” section in assignments
Duplication of the “Assignment methods” option on the “Settings” page in the new design
Let’s take, for example, the settings page for any test.
Click on it, and you’ll see that an additional option appears here that wasn’t there before, namely “Assignment methods.” It allows you to configure access through the learning catalog, including groups and categories, or to enable automation rules.
Configuring Assignment Methods
And, accordingly, since this block is duplicated, it operates synchronously. In other words, if we make changes here, they will also be reflected in the task settings, and vice versa.
The “Create a new rule” button in the “Assignment mode” section
In previous versions, it was only available on the task creation page. In LMS Collaborator 3.3, we’ve added this button everywhere where automation rules can be enabled — for example, in announcements, task sets for development plans, or in work task templates.
The process is the same everywhere, since all you have to do is click the “Create a new rule” button. After that, you’ll be taken to the settings page, which opens in a new tab. You can also select an existing rule from the list.
Creating a New Automation Rule in “Assignment Mode”
New metric for the Excel task report
Test report? Program report? Course report?
No matter which one you need, they will all be exported in a single, standardized format. In the reports, you’ll see sections with general information about tasks, statistics on current user statuses, the number of users, and their percentage breakdown.
A new metric in the Excel report
Importantly, for all users with the status “Not started”, “Failed”, or “In process”, that is, for those who have not completed the task, we have created a new, separate metric.
Status change when deleting comments in the workshop
Probably every moderator has encountered a situation at some point where they receive a notification about a new comment on a workshop, go to reply to it, only to find that there is no comment there because the user has already deleted it. As a result, time is wasted trying to figure out how this happened and whether anything was missed.
To prevent similar mix-ups in the future, we’ve set it up so that when a user deletes their comment, the workshop’s status automatically changes to “Started,” and the outdated notification is deleted.
Status Change in the Workshop Report
The ability to save and send a message to a new user
And last but not least.
The “Save and send notification” option when creating a new user is now available in the system. Click it after filling out all the required fields, and the user will immediately receive an email confirming that registration was successful, along with their login credentials.
“Save and Send Notification” option
But this feature isn’t mandatory. For those who don’t want to send the email, there’s always the good old “Save” button.
Read about the previous version of LMS Collaborator 3.2 here